Bias Tape Maker Instructions


Written Instructions With Photos.
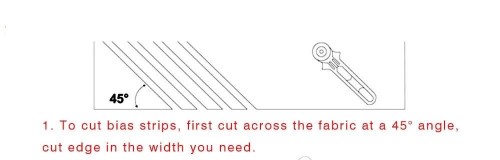
To cut bias strips, first cut across the fabric at a 45 degree angle. Cut edge in the width you need.
Keep in mind that the bias tape maker will reduce your fabric diameter in half when making single fold bias tape.
Example: 1 inch bias strip inserted into bias tape maker will become a ½inch single fold bias tape. Folding a second time and ironing will create double fold bias tape of ¼inch size.

Cut the end of your bias strip off at an angle to help insert into the maker.
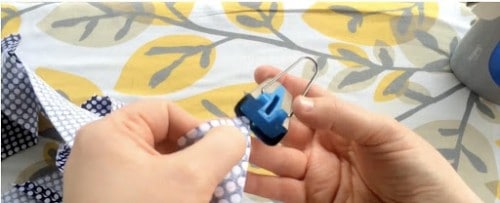
Insert the angle cut end of the bias strip into the larger side of the bias tape maker.
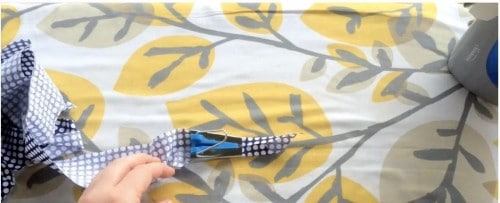
Pull the fabric through the bias tape maker to the narrow end. Use awl to assist pulling fabric through.

Optional: Pin end of strip to ironing board.
Pull tape maker and iron the strip, while keeping iron close to tape maker.
Use your iron’s steam setting while ironing, it creates better folds.

And there you have it, Single Fold Bias Tape.
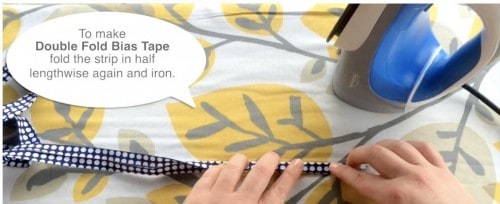
To make Double Fold Bias Tape, fold the strip in half lengthwise again and iron.
Bias Tape Maker Sizes Included:
- 6mm (¼ inch) Bias Tape Maker (Green)
- 12mm (½ inch) Bias Tape Maker (Yellow)
- 18mm (¾ inch) Bias Tape Maker (Red)
- 25mm (1 inch) Bias Tape Maker (Blue)


